Time to roll forward with some new posts! Let’s talk about a side project I’ve been working on for when I redo the front path.
Obligatory This House Is Cursed update: we have now been trying to get a new roof since February 2018. It isn’t as simple as just finding a new company. No. No. a-hahaha…just…no. And Tropical Storm Isaias is about to hit the East Coast and we are so sick and tired of rain in the living room and…
Anyhow. Brooke here. One of the projects on the Neverending List of Things to Do is to redo the front walkway. It’s cute but it’s nothing but large irregular flagstones, and we want something that’s wheelchair-accessible. After haunting Craigslist for months, I’ve got a collection of 18″ square pavers that will be set off by brick for a nice 36″ wide walkway. But I’m about five pavers short, and it’s an uncommon size not found at the big box stores. So the options are to buy them at a premium (with shipping!), wait until they show up on Craigslist again, or make them.
So let’s play with cement!
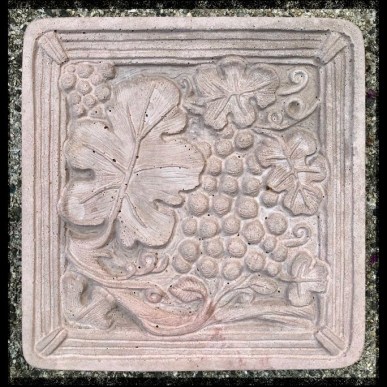
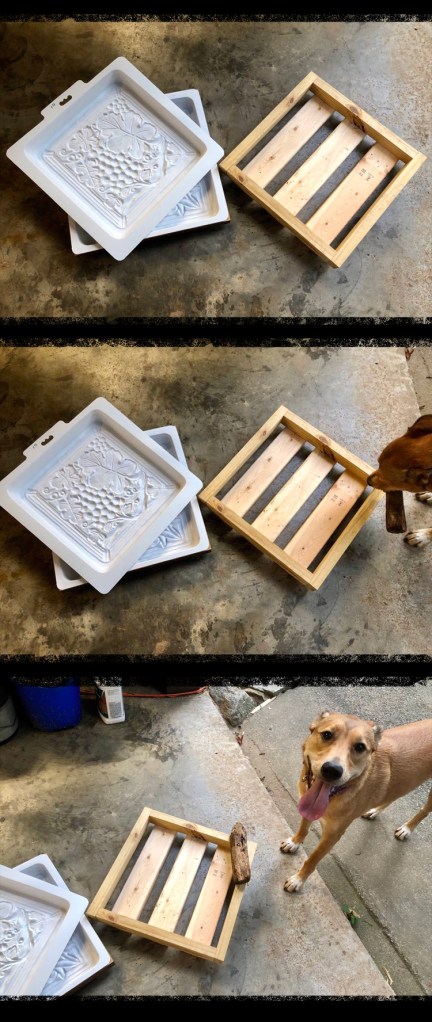
Instead of getting a standard square mold, I bought two plastic forms from Garden Molds. These are reusable heavy-duty poly, but they’re expensive. That’s cool, this is an experiment, nobody succeeds on the first try, etc. I’m going to make as many as I can until the molds break, keep the two best ones for us, and then return the other good ones to the Craigslist ecosystem so this project doesn’t contribute to this gigantic money hole in the shape of a house.
To make the molds last longer, Brown and I built some wooden frames. These will take the weight off the lips, sides, and bottoms of the plastic molds, and prolong their lifespan.
NOTE: You can’t use a standard bag of concrete for this type of project. Most concrete mixes contain rocks up to an inch in diameter, and those will settle straight to the bottom of your mold, which means those rocks will be embedded in the top of your stepping stones. Instead, you want a bag of mortar, which is a much finer aggregate and will give you a clean finished product to show off the details of the mold. I’ve been using a mortar “S” type, which is good for load-bearing and exterior applications.

Five minutes before I pour the mortar mix into the mold, I coat it with a mold release agent. The giant ants say you can use cooking oil, but I’m new to this. Instead of introducing another possible point of failure, I got professional mold release spray which works like a splendid chunk of whoa!
The mortar mix gets coloring agents and an extra handful of fiberglass fibers for strength. Then, the mix goes into the molds, and the wooden frames get smacked with a rubber mallet until the air bubbles come out. I wait ten minutes for the mix to set up very slightly, and then I press an old towel against the surface so the back of the stepping stone gets a slight textured pattern. I don’t know why I do this, as nobody else is going to see it.
After that, it’s time to walk away and let the concrete cure in the molds. I’ve rushed this a few times, and the stone has cracked. Patience, virtue, and so on. But if you’ve done everything right, it all comes together.

We would love to feature this in our online magazine! Please contact us at art@musacreativamagazine.com