Brooke here. Earlier this spring, I wanted to build low-cost elevated strawberry planters. This is how I failed.
I’ve got a friend who loves strawberries but can’t go strawberry picking due to mobility concerns, so I got the idea to build some strawberry towers and see if these would be a good alternative. Anybody can buy a strawberry pot, but those are mostly for decoration because the yield is terrible. There are DIY plans for strawberry towers, but cedar and redwood boards are hard to get around here and you shouldn’t use pressure-treated wood in gardening because leach leach leach. If I could have gotten the materials for under $50, I would have built this pyramid tower. If I could have gotten the materials for under $100, I would have built this delux pyramid tower. (Here’s the super-delux version which would probably come in far above $300, but I didn’t price it out.) These wouldn’t have helped with access to strawberries on the lowest tiers, but if you put low-maintenance flowers in those, they’d never need tending as watering the top tiers would end up watering the bottom ones.
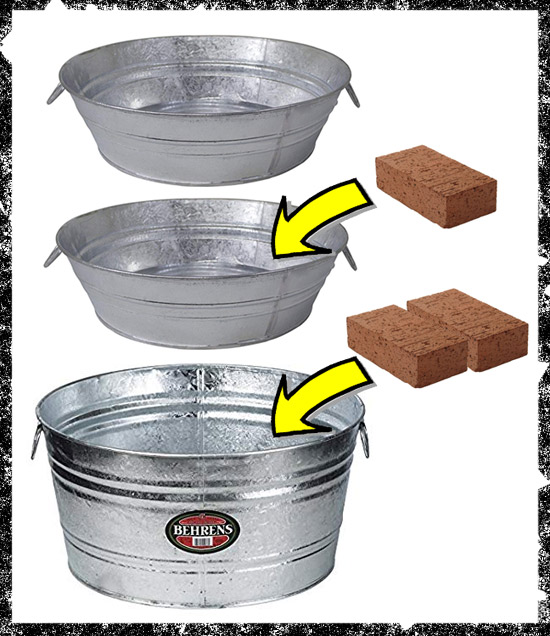
Since I couldn’t get the lumber I wanted, I went with galvanized metal tubs. I found nine 3-gallon Behrens tubs on sale for $9 each, and four 17-gallon tubs on sale for $14 each. I had plenty of bricks available to use as elevation for each tier. I drilled some holes for drainage, epoxied the bricks to the bottom, added soil, flowering plants to the 17-gallon tubs and strawberry plants to the 3-gallon tubs, aaaaaand done.
Aaaaaand…..no.
After a few weeks, the strawberries in the middle tub began to show signs of serious stress. They got enough light, but the plants weren’t getting enough air circulation around the roots. Back to the drawing board. This time, I wanted to elevate the top tub from the middle tub using something other than bricks.

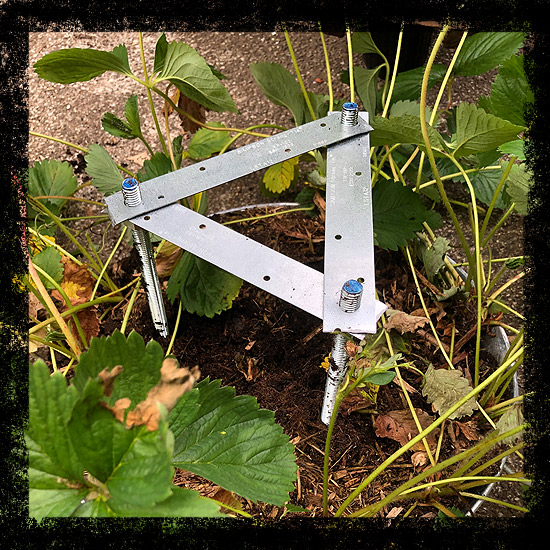
The plants in the original middle tubs are still in plant hospice, but I’ve got five (five? yes, five, since I can’t add properly and bought an extra tub by accident) top-level tubs that I can work with until the middle ones have healed up. I went to Home Depot and spent $25 on six metal bracing straps with 1/2″ holes, three 1/2″x12″ threaded rods, twelve 1/2″ bolts, six 1/2″ washers, and six 1/2″ bolt locks. I ended up not using the bolt locks.

I chose two top tubs and popped out the plants and dirt. Easy job, as the roots have knitted the soil together into a mat.

Then I took the two empty tubs, stacked them on top of each other, and used the straps as a template to drill three holes in each tub with a spade bit. Don’t forget to hit the holes with some steel wool and spray galvanizer to prevent rust.

Once the pieces lined up, I bolted the straps to the bottom of the middle tub (be sure to work backwards and add the bolts that will be on the inside of that tub, then insert the threaded rods into the tub, and then use the straps, washers, and bolts beneath the tub). I took one of the strawberry mats and shoved it down so the threaded rods popped up through the dirt.
Repeat the bolt-washer-straps phase for the top tub. You can eyeball the measurements on all of this. Don’t worry if there’s a level difference. You won’t be able to tell by looking, and the plants won’t notice unless the water runs towards one side and leaves the other side dry. Add the last strawberry mat, and you get a This! 
Nice, right? That’s seven inches of clearance for the middle tier, and should be plenty of air flow. The extra holes at the bottom won’t hurt, either. Now, let’s get out the epoxy and put it all together…

There we go! I’ll wait a few weeks and see how the plants do, and then build another one, or finish the entire project if the plants from the original middle tubs are out of hospice. And now that these tubs are off the ground, the dogs won’t keep scavenging in them.
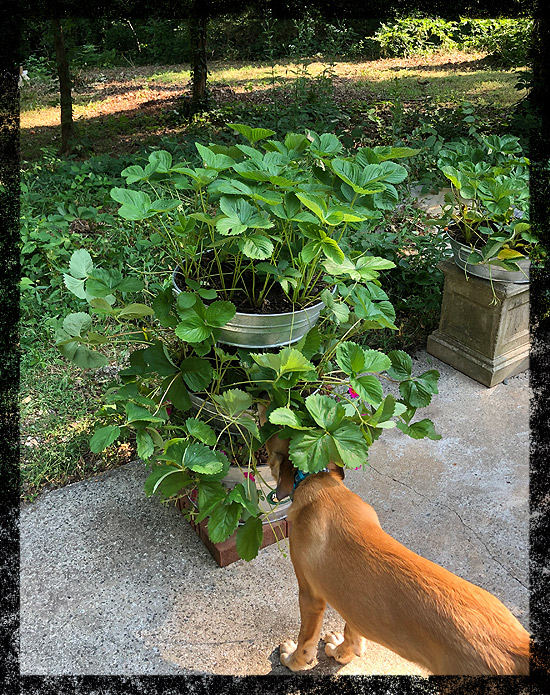
………..dang it.
Anyhow, the project is a failure as the materials for each individual tower came to more than $50, which isn’t cheap. For $45, you can get a premade cedar mini-tower that you can drop on a plant stand or the center of a picnic table. Hopefully these galvanized tubs will last for at least five years before they rust out, so they’ll earn their value.

Thank you! This looks very interesting, and I believe there’s some cedar clapboard around here … somewhere … that’s among the gazillion things I couldn’t throw away. Seems like used siding might be the perfect thing. Good luck with yours, and please post if you figure out the hound issue.
The finished product is really pretty! The flowers at the bottom give it a great pop of color. I’d love to see pictures when the strawberries are all red and ready for picking 😮
Friend has an aquaponics setup using PVC pipes for strawberry towers:
https://www.growaquaponically.com/watch/?t=How+To+Build+Strawberry+Towers%253A+2.0&id=fxmm3iMJMyM&d=aHR0cDovL3d3dy5CaWdlbG93QnJvb2suY29tL2RvbmF0ZSBBZnRlciBzZXZlcmFsIHllYXJzIG9mIGdyb3dpbmcgd2l0aCB0aGUgb3JpZ2luYWwgc3RyYXdiZXJyeSB0b3dlcnMsIHdlIHJldmlzaXQgYSBkaWZmZXJlbnQgZGVzaWduIGJhc2VkIG9uIHRoZSBaaXBHcm93IC4uLg==&q=aquaponics,arduino%2520gardening&u=Bigelow+Brook+Farm+%2528Web4Deb%2529